Picture Framing & Art Conservation
Information, advice, and inside tips from a professional picture framer and artist.
***********
What you should know before framing a picture
***********
How to frame fine art on paper
**********
How to frame art for conservation
**********
Picture frame design: what to know before spending $$
**********

©2000-2012 Sharon Hudson


In addition to being an artist, I have been a picture framer for over 30 years, so I know that many people are frightened at the prospect of framing a work of art. They need help! Framing prices seem high, and most people know nothing about the process, so they are insecure. Luckily, the do-it-yourself picture framing movement has demystified framing somewhat, and I hope this article will also provide enough information on framing and conservation of fine art to help you get started on framing your pictures. And your framer should be willing and able to explain what is going into your picture frame job, and why.
Picture frames have two purposes: to help preserve the work of original art (especially works on paper), and to provide an attractive presentation of the art. This article provides some basic information about art conservation and picture frame design, as well as some practical advice about picture framing. At the end of the first section are some links to a website that provides excellent information about the preservation and care of original art and other collectibles.
And, when you finish reading my tips and advice on art conservation and picture framing, please visit my art gallery...
 |
 |
 |
 |
 |
Click each image to see similar work or visit the artist's GALLERY.
|
|
ART CONSERVATION
One of the major purposes of framing is to diminish or delay the effects of aging on artwork. This means protecting the art from damage arising from (1) physical abuse like bumps, punctures, abrasion, and dirt, (2) the chemical effects of air pollution, (3) excessive light, (4) excessive heat or cold, (5) excessive humidity or dryness, and (6) insects.
Young artists generally pay little attention to the quality of materials and the future of their work, but as we get older we try to ensure that we use "artist quality" materials in our work. These are materials such as pigments and papers that will not deteriorate over time. Nonetheless very few artists succeed in using these materials all the time; most don't have enough money to do so, and many contemporary artists work spontaneously in unconventional media, grabbing anything at hand and including it in their work. In addition, I have found that not all materials labelled "artist grade" are in fact lightfast (nonfading). Therefore people who buy original works of art should not assume that the work is going to last "forever" (why should it? nothing else does), but should instead consult with the artist and framer, and use common sense in considering the materials used and how to best preserve them for a reasonable cost.
Framing to fully preserve the art is often called "museum" framing, but museums must preserve art for all time, while most of us need to preserve it only for a lifetime or two. Museum framing has a very stringent sent of protocols that demands, among other things, the full reversibility of anything done to the art. The framing discussed here might better be called "preservation" or "acid-free" or "acid-reducing" framing, which is similar but less stringent, and allows for some irreversible procedures, such as mounting with non-resoluble adhesives. I will also focus on works on paper, since the vast majority of my own work is on paper.
Protection of paper
Preservation framing has become increasingly important because of the increasing acidity of papers and pollution of the atmosphere. Most papers are made from wood fibers and are more or less acidic, and, upon exposure to ultraviolet light and acids in the air or acids in objects placed near them, become even more acidic and turn brown and brittle. The "cheaper" the paper, the quicker this happens; everyone knows a newspaper turns yellow and brittle very quickly. At the other end of the spectrum are "acid-free" paper products, either made of non-wood plant fibers like cotton or linen (hence called "rag") or of alkali-buffered wood pulp. Using these products in producing, framing, and storing art will preserve the art for the longest possible time.
The framer can help primarily by surrounding the artwork -- front, back, and sides -- with acid-free materials. One purpose of the mat, for example, is to provide a three-inch buffer between the art and pollutants that creep in from the edges. Of course the mat itself should be acid-free. When acidic mats are put in contact with the art paper, acid migrates from the mat and creates visible browning of the art paper, not just directly under the mat but also creeping into the art from the edge of the mat. This may be noticeable around the edge of the mat window within a year or so, and damages the fresh, pristine look of the art.
Of course, the art paper should also not come into contact with acidic materials from behind; never put corrugated or grey cardboard up against the back of a valuable work of art. Foam boards are not usually completely acid free, but they are quite inert and, except for the most valuable or delicate pieces, are probably adequate for backings. But don't mount valuable art onto foam board; it is too easily dented and punctured.
Frequently compromises are made (not by museums, but by the rest of us). For example, less expensive, acidic materials may be used inside the frame, but not right next to the art. This is okay, if done correctly, and may prevent visible damage for many years, but keep in mind that it is the acidity of the entire environment within the frame that will ultimately affect both the art paper and media.
If you want to preserve works on paper for many decades, then, you should use acid-free mats and backings. But this is expensive, so be reasonable. If you have a poster, or a crayon drawing with fugitive colors that will fade in a year, there's no point in trying to make the paper last a century. The good news is that the life span of even very acidic paper can be greatly lengthened by acid-free framing, especially by mounting it to acid-free backing, because then the acids actually migrate OUT of the paper, although the paper will still gradually darken. If you don't mind the gradual darkening, even works on newsprint will last just fine if properly cared for.
The mat also creates room for the art paper to expand and contract with temperature and humidity changes. This is very important. If the paper butts up against the frame, or is constrained around the edges in some other way, the art will wrinkle when it expands. We have all seen this, usually on posters, and it's not a pretty sight. The thinner the paper, the bigger this problem. Expansion is the main reason that artworks on paper must hang freely in the mat, hinged only in a couple of places at the top. But, if you do not want to use a mat, there are a few other ways to prevent wrinkling (as well as to separate the glass from the artwork), which your framer can explain.
The other consideration in the hinging is that the hinges should be weaker than the art paper if the art paper is at all fragile. This is so that the hinges and not the artwork will tear if the frame takes a serious bump. But the inexorable pull of gravity wears on the fibers of the hinge and the paper even without traumatic events. If you have an older work whose hinges have failed, therefore, don't be too critical of the framer. Even modern adhesives may not be able to perfectly straddle the line between permitting the hinge to fail when necessary, but to otherwise hold perfectly over decades, especially if the artwork is moved around.
The final important function of the mat is to separate the glass from the surface of the artwork. Placing glass tightly against almost any media is damaging over time; for example, if you place glass directly against either oil or acrylic paint or oil pastel for any length of time, the glass can stick to the media and either discolor it or pull it off. The air space created by the mat also protects the art from moisture, heat, and cold. Moisture, which occurs not only in the form of atmospheric humidity but also sometimes as condensation behind the glass, is damaging not only for the obvious reason (water drooling on your art is not a good thing), but also because mold and mildew may grow. Dry pastels and charcoal drawings should have a deeper air space, because an electrostatic charge may cause the chalk particles adhere to the glass surface if it is too close. For the same reason, plexiglass should not be used to glaze these media.
Mounting of Original Art
If a work of art is not flat, or is structurally fragile, you may want to mount it, perhaps with the artist's permission. To mount a work of art means laminating it to a stiff backing board so it stays flat, and sometimes to strengthen it if it is fragile. However, anything that changes the original intended state of a work of art generally decreases its market value, so very expensive or historical works of art are only mounted in the most unusual circumstances, and in consultation with a conservator. Whether or not to mount a work of art is always a trade-off between your enjoyment of the work in a flatter or more regular state, and its eventual resale value, if significant, which may be enhanced if the work is in "original condition." Mounting is a stand-alone process, and you don't have to have your mounting done at the same place you buy your frame.
If you value the work of art that you mount, always use "museum" mounting or wet mounting; never use spray, rubber-cement type adhesive on valuable works, as it starts to dismount and bubble within only a few years. Wet mounting is done with special water-based adhesives, these days often in a vacuum press. Some adhesives are resoluble with water for museum mounting (which is a reversible process); for run-of-the-mill preservation mounting, the glue may be resoluble or not, but it is still acid-free and very durable. Mounting is a time-sensitive process that must be done by an expert who has everything handy and is not distracted. If you plan to mount a work of original art, be sure to take it to a frame shop with experienced personnel working in a clean, roomy, organized, and quiet environment.
The backing used may be acid-free rag or paper matboard or mounting board of the usual mat thickness (about 1/16 inch), thicker board of the same type, or some kind of synthetic board like foamcore. Occasionally pieces are mounted on a fabric, like a fine canvas. Whatever you use, it should be of neutral acidity, or possibly a little alkaline. I usually use buffered or acid-free matboard. I don't recommend mounting on any kind of soft-centered foam board, because even though these may have a nice surface, are light, retain their flatness well, and are chemically inert, they are too easily punctured or dented if a sharp object strikes the piece either from the front or the back. This can cause irreparable damage to the art. Don't mount works on paper on wood or any type of standard cardboard, as these are very acidic and damaging to the art, among other reasons.
In my opinion, mounting is the most difficult and risky framing activity; many things can go wrong and most are irreversible. Which is one reason not to mount unnecessarily. On the other hand, I prefer my own art to be flat and would always mount it if necessary to make it that way, and hope that people who buy my work will do so as well. If possible, I always mount works done on newsprint, because thin papers wrinkle more in the frame, and because mounting newsprint to acid-free backing is chemically good for it and physically strengthens it. Mounting any thin paper is difficult, however, and once again, experience is the key: you don't want your framer to learn anything new and interesting about mounting using your original art.
Glazing and protection of media
Proper matting and mounting both help protect the paper in works on paper. But the paper is not the only thing that needs protection. Like papers, most media are also subject to environmental damage, though this damage may be slower and less visible. The yellowing of paints, varnishes, and other coatings is one example. This yellowing comes from chemical interactions with both the air and the underlying support of paper, canvas, board, etc., and is made more rapid with exposure to light. As an artist, I think it is a good idea to use as few unnecessary coatings as possible. The historical trade-off here is that varnish has traditionally been used to protect the painting, because the varnish--and the dirt it contains--is removable. Oil paints and varnishes are also much less porous than acrylic paints and coatings, and unprotected acrylic paintings will pick up dirt (keep fingerprints off them!) much more quickly than oils or varnished acrylics. But it is the varnish that cracks and darkens, discoloring within only a few decades, and over centuries almost completely masking the bright colors of the original painting. Naturally one should use a kind of varnish that is removable and does not crack or yellow, but there is no perfect varnish, although acrylic coatings yellow very slowly compared to oil-based varnishes. Removing old or dirty varnish is not a do-it-yourself project. Instead of varnishing, although generally works on canvas are not glazed, one may wish to frame acrylic paintings on canvas under glass because of their tendency to absorb atmospheric grime.
Sometimes "varnish" or some kind of coating--usually acrylic-based--is used on works on paper for aesthetic reasons, that is, to regularize an irregular surface or change its glossiness or texture. But for protective purposes alone, there is no reason to varnish most works on paper because works on paper will be protected by glass anyway.
In addition to yellowing or darkening, the other main concern is pigment fading; obviously, we do not want any colors to fade noticeably. (Yellow pigments and dyes almost always fade first, turning greens to blues, oranges to reds and pinks, etc.) Artists should do their utmost to use lightfast materials, but this doesn't mean we are limited to traditional media, since many other materials either happen to be lightfast or are designed to be so, such as many wallpapers and some exterior paints. And let's face it, these days part of what makes artists artists is their tendency to add anything that strikes their fancy to their art work, so one cannot count on the "purity" of materials in contemporary art. One element that artists and framers should be especially suspicious of is colored magazine images used in collages; they are almost never lightfast. However, these images can be duplicated, and both printing and photocopying technology have improved so quickly during the past few years that these reproductions can be as lightfast as most artists' materials, or more so, thus removing the main impediment to collage as a fine art form. In any case, buyers should consult with the artists about what has been used in any work, and take precautionary measures, such as framing with UV-protective glazing, if some materials are in doubt.
If there is reason to be concerned about fugitive pigments or other kinds of UV-caused deterioration, you can glaze with ultraviolet-absorbing glass, which is available at your framer for about 1-1/2 times the price of regular glass, or with UV-absorbing plexiglass. Both absorb 97% to 99% of UV rays and are used by museums. UV-protective glazing is gradually becoming less expensive. After seeing supposedly artist-quality media fade over decades of normal household light exposure, I now recommend UV glass for all pastels, colored pencil, collage, and mixed media works. I definitely recommend UV-protective glass for any valuable glazed picture in bright light from a window, or much exposure to fluorescent light, such as in an institutional setting, since I have seen even high-quality media fade quickly in such circumstances, and we all see plenty of faded prints in institutional halls and offices. However, even 99% UV glass won't work miracles: if a fugitive medium would otherwise fade in a month in bright, indirect window light, under 99% UV glass it would still fade in eight years.
Oil paintings with permanent pigments are said to be unharmed by sun exposure; in fact, the linseed oil paint binder darkens in the dark and becomes clear again when exposed to light, so an oil painting will actually brighten up under bright light. For this reason, you may reserve the brightest walls of the house for oil paintings (or other nonfading media like mosaics). However, the sun will still hasten the yellowing and cracking of any varnish on top of the paint, if there is any.
Sometimes the media themselves emit chemicals that are damaging to each other and to the paper. For example, artists are not supposed to paint with oil paint on paper, although many do so, including me. It obviously embrittles the paper over time, but I think you can just mount the artwork to provide structural strength, and not worry about it. Oil-based media also emit fumes that gradually deposit an oily film on the inside of the glass. This probably doesn't damage anything much within one person's lifetime, but if it becomes noticeable you might have to open up the frame and clean the inside of the glass. I was shocked to see such a film develop after only a few hours once, when I was unable to protect an oil pastel from the sun during an outdoor show! During the same show, moisture also condensed and ran down the inside of the glass on another piece, but did not damage the art because it was properly separated from the glass. The lesson: most art is not meant to be outdoors! By the way, NEVER leave your framed art sitting in a hot car, where condensation can be rapid.
Paintings on stretched canvas are traditionally not framed behind glass. However, you may wish to do so if you live in a particularly dirty area. Remember, one of the main reasons for glazing is simply to protect the art from regular old dust, dirt, and oily smog, which will adhere to the surface of your paintings just as it does to everything else in your house. Although it is true that oil paintings should be allowed to "breathe" (because oil paint continues to emit vapors for many decades while drying) and should not be tightly enclosed, in a dirty urban environment, one may nonetheless choose to protect the front of the painting by glazing while hoping that it may breathe somewhat through a ventilated back. However, the glass will probably have to be cleaned from the inside occasionally to remove the oily film, and I would not recommend glazing an oil painting that is less than several years old. As mentioned, also, acrylic paintings are porous and will absorb more dirt than oils.
When framing works on paper and sometimes works on canvas, wood frames are backed with tight paper backings. This keeps out dirt and insects. It is easy to puncture these backings, but they are easily replaced. Try to patch any holes that occur. Metal frames are not backed, mostly because there is no very aesthetic way of doing so. This means that insects like silverfish can creep in around the edges. Luckily it is fairly easy to open up a metal frame and clean things up.
Care of art and other collectibles
Finally, use good judgment about what you do with both your unframed and framed art once you get it home. All unprotected paper and textile items are gradually damaged by smoke, chemicals, and oils emitted by cigarettes, incense, candles, etc. No original work of art on paper or fabric belongs in the bathroom; put ceramics, glass, wood, or non-corroding metals in that humid environment. Anything in the kitchen will sooner or later be covered with oil; objects that have been near a stove for a number of years will have to be washed with acetone to remove the greasy film, so limit these items to metal frames and glass and other items that will not be damaged by acetone. Also watch what you put over your heater, as heat hastens all chemical reactions and constant expansion and contraction is not good for very many art media. No original art should be placed in direct sun for the same reason, and due to possible condensation in glazed works. For your own safety, be careful what you put over the head of your bed. Use picture hooks rather than nails to hang your art. You can keep pictures straight by placing a little reusable sticky putty behind a lower corner; this removable putty is sold in hardware stores for sticking posters to the wall; use the kind that will not leave a grease spot. As for sculpture, if you live in earthquake country, be sure to fasten breakables to the shelves with florist's or museum putty, and fasten the shelves to the wall.
Storage is also not quite as simple as it seems. Store works on paper between acid-free papers, and not enclosed with works in oil-based media. Never store art in a used garage because car exhaust is especially damaging to art; if you absolutely must do so, seal it in plastic. Pastel and charcoal drawings obviously must not have things slid across their surfaces; they require a cover sheet held firmly in place. If you have to roll an acrylic or oil painting, roll it as loosely as possible, around a tube (to avoid accidental crushing), but separated from any cardboard, with the painted side out, which results in less cracking.
Some insects appear to be passionate art connoisseurs and can be a problem; you'd be surprised at the ability of silverfish, moths, and other insects to get inside your seemingly tight frames! Mostly they just wiggle under the glass and ruin your mat, but they can do more serious damage. For this reason, try to repair any holes in your paper backings. Although enclosing art for long periods in airtight containers isn't the best, if you really have to store an artwork for a long time, even a framed one, you may need to enclose it in insect-proof plastic sealed with tape. It pays to check on the condition of your stored art every so often.
Buyers should not expect art to last forever. Museums attempt to delay the fading of artworks by putting them in dark storage most of the time, regulating the temperature, using dim lights, and providing all kinds of UV protection on the lights, or the display cases, or both. By taking these precautions, and applying other kinds of maintenance and restoration, museums have managed to preserve art works for hundreds of years. This leads people to believe that fine art created by responsible artists lasts hundreds of years. It can--but only if you never want to look at it, because all light sources, exposure to pollution, and handling damage art over time. Caring for art is rarely about preventing damage; it's always about delaying damage.
Well, by now you are probably afraid to even touch a work of art, to say nothing of own one! But the good news is that the vast majority of all art is framed rather conventionally without much fuss, and then hung on a wall, managing to stay there, out of trouble and looking fine, with no further upkeep, for many years. The owner, on the other hand, gradually shrinks or expands (or both), wrinkles, darkens or fades, and requires continuous protection from the elements and expensive maintenance. (Well, okay, maybe that's not exactly the GOOD news...)
For more information on protecting your artwork, look at the following site, which provides brief, thorough, and readable information on the preservation of many kinds of artifacts.
Caring for your artifacts by the Henry Ford Museum and Greefield Village:
http://www.thehenryford.org/
research/caring.aspx
This site covers all kinds of collectibles from furniture to textiles, in addition to art.
PICTURE FRAME DESIGN
The right frame of mind
Along with conservation, enhancing the work of art through tasteful frame design is the other major purpose of framing. You should go to an experienced, professional framer to get help with your frame design. Remember, you can get design help at a frame shop without committing to a purchase, and in shopping around for a frame you should review several design options as well as different price alternatives. Different shops have different mouldings, design ideas, and specialties (fabric or French mats, for example). Don't be shy about utilizing professional expertise. And, to avoid basing a lifelong design decision on small differences in price, why not start by mentally "budgeting" a generous amount for the frame that is sure to cover almost any design choice? Then you can stop worrying about money and have fun with your design.
In addition, be flexible when considering design options. I am an experienced designer, but I find it useless to "armchair design" a frame; I am always surprised by what happens when I see the actual colors and textures of the mats and frames next to the artwork. And don't bring too many preconceived notions with you. Here are a few common ideas about framing design to leave behind:
1. I am going to use an inexpensive readymade frame, or even a frame I already have around the house . . .
No you're not. Believe me, for any picture bigger than a snapshot, your chance of achieving a good frame design with a frame you already own is nil. And although the choice of tasteful readymade frames is better than ever before, the chance of finding a readymade frame that is the right size, proportion, and style is ALMOST nil, except in the case of a few standard-sized canvases. Suffice it to say that frames designed to look adequate on many things look truly excellent on few things. And you also don't want to be designing to coordinate with or fit the frame instead of the art.
2. It's ridiculous to spend more money on the frame than I spent on the art . . .
Ironic, yes; ridiculous, no. Because the price of the art has nothing to do with it. What you are spending money for is to create an object that will provide you with pleasure for some period of time. You will add both real and aesthetic value to the art and increase its lifespan through better framing, and diminish all through bad framing. In fact, for small or inexpensive works of art that are valuable TO YOU, you will probably spend much more on the frame than on the art. And it's not a good idea to skimp on something you will be looking at for many years. As someone once said, "I never look around my house and remember or regret how much money I spent on something, but I often regret spending too little on something."
3. I have to use a mat and frame that match my decor . . .
Only slightly true. The first consideration is to make the frame complement the art. Only then, within the range of GOOD design possibilities, choose the one that fits best with your lifestyle (you might want to bring color samples for your walls, upholstery, etc.). But don't frame your picture in dark wood just because the rest of your furniture is dark wood. And ALWAYS choose the mat color from the few choices that best complement the artwork.
4. "Traditional" art has to go in traditional wood frames, and "contemporary" art has to go in very simple wood or metal frames . . .
Not necessarily. The design or complexity of the frame should relate to the design or complexity of the piece as much as to whether it is "modern" or "traditional," and there is a greater variety in metal frames than there used to be. Both traditional and contemporary art may be simple or complex, and you may be able to achieve your desired "look" in either wood or metal.
5. "More is better" (multiple mats, etc.), or "less is better" (simple white mats, etc.) . . .
Neither is better. What is better is what complements the art. Decorative framing can be fun, and may well be the best choice for strong decorative art. But unless it is done very well, it detracts attention from the art, and is therefore often used to "dress up" empty or bad art in the decorator market. Perhaps in reaction to this, many people think that original works on paper look "best" (i.e. most serious) in plain white mats, like you see in museums. But this is equally bad: white mats do not complement most works of art, unless the work shows a lot of white paper or at least a white border, and even then it may not be the best. Good framing can range from elaborate to austere, but you must differentiate between, and eventually balance, "the look" you want and what is visually most complementary to the art.
6. I want my frame to be dramatic and memorable . . .
Wrong: you want your ART to be memorable. The last thing you want is an "eye-catching" frame that detracts from instead of supports the art. I once went to a museum exhibit of early 20th-century California Impressionism. The paintings were forgettable under a century of dirt and yellow varnish, but I will never forget their stunning, hand-carved, wooden art nouveau frames. Unfortunately nobody is in danger of finding such magnificent frames today, but be sure your framing is the supporting actor, not the star. This does not mean the mat and frame cannot be decorative and interesting. Just remember that the successful frame job is the one where people either remember your art looking its best, and not the frame, that is, where the art-and-frame combination acts as an integrated and inseparable whole.
Mat color
So how do you go about achieving this harmonious and integrated look, especially given the huge array of options available? That's where expert design help is necessary, but I hope the information below will also be valuable.
I will focus on works on paper, because most of my own work is on paper. Original art on paper is almost always matted, and, visually speaking, the mat is much more important than the frame. The 80:20 rule applies here: The mat (color, texture, proportion, etc.) will provide about 80% of the final effect, and the frame about 20%. So focus most of your attention on the mat.
The first thing I think about in matting is color, not specific colors but rather in terms of warm and cool. Does this work lend itself to warm tones (reds, oranges, yellows, beiges, browns, warm neutrals) or cool tones (blues, greens, purples, greys, cool neutrals)? Frequently there is one obvious choice, but equally often the piece can be successfully moved in either direction. Even if your mat choice will ultimately be some tone of grey, white, or off-white, there are warm and cool versions of each of these options. If there are good options on both the warm and cool sides, you can eventually make your choice on the basis of your personal preference, your decor, or what type of frame you want to use. But don't narrow the mat color down too much until later, after you have looked at the frame options.
|
| |
|
|
|
|
| |
Warm option is fine
|
|
Cool option is fine
|
|
The next things to consider in mat color are saturation and value. "Saturation" is how intense or vivid or dull the hue is. Lime green and fire-engine red are both very saturated colors; grey is completely unsaturated. "Value" is the brightness, or the lightness or darkness, of the color. Black and white are the two extremes of value. In this article, the term "white mat" refers not only to pure white, but all the off-whites, which are much more commonly used. Most of the time the mat will be fairly light in value, but not anywhere close to white.
There are three basic visual principles to keep in mind: the eye is attracted (1) to saturated colors; (2) to high-value (light) colors; and (3) to high-contrast edges, especially sharp corners. And remember: Everything is relative; the eye also tends to be attracted to whatever is different from its surroundings.
You want your viewer's eye to be attracted primarily to the art (or the center of interest within the art), NOT to the mat, the frame, or (usually) to the edge between the mat and the art. So what does this mean?
It means first that the mat should be less saturated or vivid than the art. This is why almost all mats are relatively dull or neutral colors.
|
| |
|
|
|
|
| |
Mat is too saturated
|
|
Better
|
|
Second, the mat should usually be lighter, but not too much lighter, than the art. Mats are usually somewhat lighter than the art because people's walls are usually white or very light in color. Making the mat lighter than the art eases or softens the transition between the art and the wall, and focuses attention on the art by making the contrast between the art and the mat slightly greater than between the mat and the wall. A light mat also visually gives the art room to "breathe" or expand, while a mat darker than the art visually constrains and shrinks the art. Rarely is the latter effect desired. Finally, a black mat might look good on the framer's table, but it usually looks disastrous on a light wall.
|
| |
|
|
|
|
| |
Mat too light; picture rectangle is more eye-catching than flowers
|
|
Mat too dark; flowers stand out, but picture is too enclosed
|
|
The apparent contrast between the edge of the art and the mat should not be greater than the contrast within the art, or at least in the center of interest of the art. If the value or color of the mat differs too much from the value or color of the edges of the art next to it, the viewer's eye will be attracted to that edge, which is rarely desired. Minimize this contrast to keep the viewer focused IN the art and not too much on its edge.
|
| |
|
|
|
|
| |
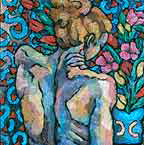
Warm mat contrasts with cool background to highlight the edge and shape of picture and the role of the negative space
|
|
Cool mat blends with background and lets figure stand out
|
|
In spite of this general principle, it is common to "outline" the art with a darker second mat or other decorative edging (painted bevel, filet, etc.). This is done for decorative effect, to add depth and dimension, to "pick up" a color in the art, to help relate the frame to the art, or to "crisp up" the edge of the art. Ask yourself if indeed you want to draw any attention to the edge of the art (which, by the way, also encloses the art). Sometimes you will, sometimes you won't; this depends on your interpretation of the composition. Extra edging may also be undesirable if there are many lines near the edge of the art.
|
| |
|
|
|
|
| |
This version emphasizes the figure only and provides a light, airy feeling
|
|
This version emphasizes the relationship between the figure and the picture rectangle, and the role of the negative space in the composition
|
|
If you do choose to outline your art, do so subtly. The prominence of the edge you create will depend both on its color and its amount; that is, narrow edgings are less visually obtrusive than wider ones. A 1/16" black edge might be the visual equivalent of a 1/8" dark grey edge or a 1/4" light grey edge. So there is a lot of flexibility here. But be wary of any edging that appears, from normal viewing distance, more contrasty or prominent than the art itself.
|
| |
|
|
|
|
| |
A little too contrasty edge emphasizes the picture rectangle; the eye jumps between the baby's hair and the edging of the same color
|
|
Softer edging allows baby's hair and woman's face to be the most contrasty areas
|
|
Remember too that the bevel of the mat, which shows the edge of the matboard, will be near-white and may play an undesired role in your design. (The bevel is usually not visible in the corner samples used for designing, so it is easy to forget about this until it is too late). Also keep in mind that if your mat is not acid-free, this nice white edge will turn yellow in a few years. Your framer will give you options for eliminating unwanted bevels. They can be painted, or another form of spacing can be used. But the least expensive way to eliminate the edge is to "reverse cut" the bevel, which hides the edge of the matboard, and should entail only a minimal extra charge, if any. I have reverse cut or painted the edges of almost all the mats in my own home.
Putting all these optical factors together, you get what is basically the norm for tasteful everyday matting: a light, neutral mat, perhaps with a subtle interior edging (double mat). And, as you can see, unless your art includes a lot of white, or has a white edge such as in a traditional etching or lithograph, a white mat is not usually indicated on a purely visual basis. Likewise, a dramatic black mat, which draws attention to the edge between the mat and the light wall, is appropriate only in the rarest cases; even then, the high-contrast edge between the black mat and the light wall should probably be softened by a substantial frame of medium value. Finally, for a very "rich" artwork, including many fabric or textured works, you may find that all standard paper mats somehow look weak or anemic. In this case, try one of the many available decorative paper mats or a fabric-covered mat. Most custom frame shops will have a selection of fabric mats available, and some will cover mats with fabric you provide.
But, you may object, you see white mats all the time! This is true. White is the most complementary choice for some pieces, including some very light or delicate works, and brightly colored works with no dominant color direction, and/or a variety of colors around the edge. In these cases, white is more or less the default color. In museums, many works on paper are prints like etchings or lithographs, with white borders that are traditionally displayed, usually with signatures on them. A white mat expands the paper color without drama and permits the signature to show, which is a requirement in some settings. You may wish to display the signature if it says "Picasso." However, you are not obligated to show the signature on the white edge of a print, and you may wish not to if it ruins the frame design, which it often does.
Photography is a medium that is often displayed in white mats, and you may (or may not) want to stick with tradition here, too. If the photograph is black-and-white, be sure your white or grey mat is a precise match to the print tone. As for color photographs, unlike most paintings, which are harmonized by the artist through underlying color moods that can be echoed in the mat, color photographs "from life" may not have any such harmonization, and for them it may be difficult to find a mat color that seems right. In this case, the default color is white.
|
| |
|
|
|
|
| |
For better or worse, this bright colorful abstract photo is softened a little by this mat, but...
|
|
...its striking colors and high contrast can also hold their own against a white mat. It's up to you...
|
|
In addition, for photography a white mat has a philosophical function. To the extent that a photograph is a piece of "reality" presented as art, the white mat helps separate the "reality" within the photograph from the "reality" of the environment around it. This is why "art" photos and documentary photos more often appear in wide white mats than do snapshots and family photos, for example; the latter are not philosophical statements. In addition, photographs tend to have small-scale details, and a white mat helps isolate them for more focused viewing. However, your mat choice should be based on your own preferences, not on convention. Personally, I think it is often better to frame art photos as...well...art!
|
| |
|
xxx |
|
|
| |
A conventional white photography mat isolates the figures from the viewer, pushing them way back behind the white "window"...
|
|
...while a conventional art mat color moves the faces forward to create more intimacy. The photo also seems larger, though the frame is in fact darker
|
|
You may note that some of the frame designs that I have presented as less desirable are the ones that are most striking at first glance. This is because your eye is attracted to a high-contrast object, namely, the edge of the art next to a white mat. This is the kind of presentation that will make something stand out at first glance in any cluttered environment--in other words, how someone might design a poster to "sell" in a poster shop. This is why posters almost always have white, or less commonly, black borders. However, what most people want in their home environment is a presentation that is more restful, and allows them to focus on the most interesting parts of the artwork without edge distraction. Over the long haul, this is more respectful to both you and the artwork. In fact, you will spend more time looking at your art if it is more harmonious and integrated into your wall space.
|
| |
|
|
|
|
| |
White mat is striking, but emphasizes the picture edge and competes for attention with the white in the picture
|
|
Darker mat lets the eyes of the portrait stand out, and is easier on the viewer over time
|
|
Mat proportion
How wide should you make your mat? This is where your framer will come in handy; deviations from the "standard" (2 3/4" top and sides, 3 1/4" bottom) will be based on his/her experience. Too narrow, and the job will look cheap and skimpy; too wide, and the art will seem overwhelmed. Finally, be sure that the apparent width of the mat and the frame are not too similar; this always looks bad and attracts the eye to the repetition of similar forms (the "ladder" effect). The norm is for a wider mat and narrower frame, as shown in the center below, but a wide frame with a narrow liner or inner edge is also fine in the right circumstances, and common with works on canvas.
|
| |
|
|
|
|
|
|
| |
Even though the light frame color reduces the clunkiness here, the frame and mat or liner are too similar in width
|
|
Better to have a wide mat or liner and thinner frame, which is standard for works on paper today...
|
|
...or a thin edge inside a wide frame. In both these cases, there could be more contrast between liner and frame.
|
|
It is very important that the bottom of the mat be about 20% wider than the top and sides, which should be equal. This is standard, and don't let anybody talk you out of it! Optically, this proportion results in a visual balance in which all four sides look equal. If you in fact make all sides equal, the mat will look uncomfortably narrow on the bottom to most people. My primary objection to most mass-production in framing (like almost any frame you will order online) is that all four sides are the same width, which is compositionally ruinous. There are a few exceptions to this bottom-bigger rule: a narrow mat that is just functioning as a visual extension of the frame; an extremely wide mat, as used with miniatures, in which case the bottom is sometimes much larger than the top or sides; and some ethnic art, where other cultural aesthetic norms apply. And, if you are committing the unpardonable sin of trying to fit an artwork into an existing frame that does not permit the extra width at the bottom, I think it is better to shave a little off the top of the mat to add to the bottom than to skimp on the bottom.
| |
|
|
|
|
| |
|
|
|
|
| |
|
|
|
|
| |
Mat equal all around:
Help! I'm sinking...!
|
|
Mat larger on bottom:
Thank goodness!
now I can relax!
|
|
Works of art on paper do not always require mats, visually or structurally. When appropriate, eliminating the mat usually results in a considerably lower price because you save not only the mat price but all the extra costs of a larger final size. In terms of the visual requirement, if the work of art has a lot of "breathing room" in itself, you may not need a mat to separate it visually from its surroundings, and adding any extra space may be undesirable. Or, if the art work includes its own "mat," you should probably avoid adding an "extra" one.
There are other ways to present a work of art on paper besides standard matting. You can "float" the art on a backing, leaving a few inches of a nice color or texture around the sides, which is done if the physical edge of the artwork is significant or pleasantly irregular, or the art has depth to it. However, you still need to separate the glass from the art by surrounding the floated art with a spacer or a regular mat, a mat with a filet, etc. You can also make a very deep mat, or raise at mat up from behind to provide extra depth.
Structurally, to separate the art work from the glass, there are many kinds of "spacers." There are specially made plastic spacers of various colors and thicknesses, or the framer may use small strips of wood, foamcore, etc. You can use a second frame as a spacer, with the glass sandwiched between the two fames. Some of these options are dictated by structural considerations that you probably won't be aware of, but which your framer will be thinking about as he or she considers the design.
Note: frames may appear too dark on some browsers
|
| |
|
|
|
|
|
|
| |
This figure drawing has plenty of room to breathe without a mat, if the frame is wide and light
|
|
This non-objective collage obviously has its own "mat"; don't burden it with another
|
|
"Extra" matting here would disrupt the contact between the figure and the frame and soften the asymmetry, both of which are important to the work
|
|
Moulding choice
When you have narrowed down your mat choices to a handful (perhaps a few warms, a few cools, a few neutrals), it's time to look at the frame (or moulding) options. You won't be able to make a final mat decision until you have coordinated it with the frame. You will want to look at cool frames to go with cool mat options and warm frames to go with warm mat options. Avoid switching tones: for example, using a gold or warm wood frame with a blue mat.
You essentially have three choices in picture frames: wood finish frames, gold or silver finish (wood) frames, and metal frames. Most but not all wood finish frames are warm in tone, and look best with warm-toned mats. As for metallic finished wood frames, while obviously gold frames are warm and silver frames cooler, there is in fact a huge variation in both. There are both warm and cool silvers and golds, and all may have a red (warm) or green (cool) undertone, which must be respected when coordinated with the art and the mat colors. Metal frames also come in many metallic tones and textures, as well as many nonmetallic colors, and many styles, and are generally chosen for color or simplicity. In addition, metal picture frames are structurally stronger than wood ones, so you can use a much thinner frame, for a more minimal frame look, with a metal frame than you can with wood.
When choosing the frame, avoid choices that are dominating or too high-contrast relative to either the mat or the wall. You do not want your frame to be "eye-catching." However, there is some flexibility here, since the frame is expected to be more prominent than the matting, though still secondary to the art. Choose a frame that is not, visually, too "light" or too "heavy" for the matted work; again, a wide mid-toned frame may have the visual weight of a thin black one. Surprisingly, a "decorative" frame could easily be less visually dominating than a plain one, because a textured or decorative moulding breaks up the surface reflections of the frame and softens its visual impact. Likewise, the reflections of a shiny surface also break up the light and "lighten" a dark frame as well as make it more dynamic; for this reason a shiny black metal frame is often a better choice than a matte black frame. Suggestion: Avoid heavy black frames placed against white walls!
|
| |
|
|
|
|
| |
Frame is too heavy
|
|
Better
|
|
After physical strength, tone, color, and visual weight of the frame, think about the finer points of style and decoration of the moulding. Choose a moulding style that complements the art, as well as the mat if there is any textural or decorative element to the matting. Remember that the frame and mat should not be the same width. As you narrow down the frame choices you will simultaneously narrow down the mat possibilities, finally concluding with the right color and value of mat to both complement the art and coordinate with the frame.
Framing works on canvas
The same design principles apply to works on canvas as to works on paper, but stylistic conventions are different and some options are more limited. Stretched canvases are usually not matted with paper mats, but often they are separated from their frames and given visual breathing room with a fabric-covered wooden liner. These liners come in very limited colors (usually white or off-white, unless you have one especially built or altered), and are always of equal width on all sides. You just have to work within these limitations, although you can paint your liner if you want, following the principles of mat color.
On the other hand, especially with contemporary stretched canvases, a very minimal framing look is also common. So you can choose a rather thin frame profile as long as it is deep enough to cover the stretcher bars. You don't have to be concerned about strength because the canvas can always be hung by the stretcher bars instead of by the frame. You can even leave the piece unframed, if the edges are reasonably attractive, or go to the hardware store and buy some simple wood stripping, stain it, and nail it to the edges of the stretchers. Although a little informal, this is very common on larger, contemporary canvasses. Most people will never notice, since they are looking at the art.
Within the limits of the visual principles I have outlined, don't be afraid to do something interesting, textural, original, or even whimsical with your mat and frame design if it suits the piece. I am far from a purist in framing, and I believe that the art and frame together constitute the finished art object. But if you choose decorative framing, just be sure the framing does not visually detract from the art it serves. Likewise, however, a frame that is too plain or insufficient is equally diminishing to the art. Don't underestimate the power of a good framing job to "improve" a work of art.
Finally, if you remember only two things from all the preceding information, let it be these: First, take advantage of and be willing to follow professional design advice--although by "professional" I don't mean someone who has worked as a framer for two months as a summer job. And second, keep the primary focus on the artwork--not on the mat, the frame, or your decor.
PRACTICAL FRAMING TIPS
Cost
Picture framing is not cheap. This is mostly because it is a labor-intensive business requiring skilled labor; because it requires a significant number of square feet, usually in a business district, as well as a certain amount of specialized equipment; because it entails a large amount of waste; and because it carries some risk of damage to original works of art. Wood and paper products used by framers have also increased in price greatly in the past few years. Luckily, however, the result of a good frame job is a long-lasting and beautifully presented work of art. A properly framed, original work of art should have a life span of many decades, longer than other much heftier purchases, such as furniture, appliances, or automobiles.
The cost of framing is covered by markup on the price of the materials; the ostensible labor or "fitting" charge is a relatively small part of the equation. Most of the materials used in the frame are sold to the customer for four to six times the wholesale price, the average being about five times. When the framer quotes you a price for a piece of glass that is four times as much as you would pay at Home Depot, you must remember that this is the way you are paying for labor, waste, breakage, risk, and other business expenses. However, what this also means is that if you have the space and equipment, are handy with tools, and don't mind trading your time for your money, you can put together a less expensive frame from components obtained from frame shops, hardware stores, lumberyards, and art-supply stores. But you have to know what you are doing, and for most people for most frames, it's not worth it. The pricing structure also means that if you want a frame shop to perform labor on your own materials, such as cutting down a frame, the price will probably be higher than you expect, since it is selling the materials that usually pays for the shop labor.
If you are imaginative and handy, you can frame in unorthodox ways. Just be aware of the general principles of preserving the art work. In one case, I wanted a picture to suggest a large picture window. I used the same moulding used for the window frames in the house, which I got at the lumberyard, and attached the frame tightly to the wall. It was a huge picture, so I had to support the frame on the studs with brackets. In a case like this, if you don't want to miter and join your own corners, most custom frame shops will cut and join your corners for an appropriate labor charge. Be sure to insist on lots of glue.
While you are shopping around for moulding and design options, be sure to compare prices, too. There is a substantial difference between a 400% markup and a 600% markup, and there will be even greater price differences in special services such as mounting, fabric mats, oversize framing, building shadow-boxes, etc. You can get a pretty good price comparison by choosing a moderate size, say 30"x 36", and asking several shops for the individual prices of the following items in that size: (1) regular picture framing glass, (2) a single acid-free mat without backing, (3) a wet mount on acid-free board, and (4) the fitting charge for either a wood or metal frame (they may be different). Items (1) and (2) will reveal their standard markup, and (3) and (4) may tell you something about how they might price their labor if you require some kind of special service. Remember, if you actually need your art mounted, it can be done separately at the least expensive competent shop.
Size
A major factor in the price of your frame, of course, is size. But for the same size piece, a work on stretched canvas will almost always be cheaper to frame than a work on paper because there is no glass and matting to buy, though you may have to buy a liner. In any case, the price simply increases gradually with size.
The same is not true for works that are matted and framed under glass. Here the price increases incrementally until the glass and mat size reaches 32"x 40". At that point, prices rise dramatically, mostly because you have entered the realm of "oversized" mats, which are not only very expensive but are also limited in color. (For this reason, whenever aesthetically possible, I try to keep the artwork I create under a final [matted] size of 32"x 40".)
The next breaking point is 36"x 48", the largest generally available glass size, above which you may have to glaze with plexiglass, which is quite expensive. Of course, you CAN get larger glass, and/or use thicker window glass in this situation, but it will be a significant extra hassle in procurement, labor, and handling, unless you are already building your own frame.
If you have a work on paper to be framed under glass, but the matted size exceeds 32 x 40, or 36 x 48, you can also consider using a wide but flat frame without a mat, especially if the art is not "crowded" around the edges, or has some breathing room within itself. Usually a frame with a wide, flattish space between the lip and the outer edge, and decoration on the outside edge, is best for this, though other styles can also work. In my own home, I have done this for several works hung in places too small for a traditional mat. This is a better option than reducing the mat width, which usually looks skimpy. However, you still have to separate the art from the glass, using a spacer instead of a mat.
Clips and glass
If you are on a budget, one way to divide your framing bill into two approximately equal parts is to frame your art in two stages. Design the entire job at one time, but purchase the frame later (make sure that frame or similar frames will continue to be available). First, mat the art and put it into "clips and glass," a system of plastic brackets that hold the glass, mat, art, and backing "sandwich" together without a frame. Clips are inexpensive, unobtrusive, and a fine way to present the work until such time as you can afford to add the frame. At a later date, you can buy the frame, and the premium you will pay for the two-stage process is only a relatively small charge for the clips and their assembly. The clips are reusable.
This option has a few practical limitations: First, clips and glass shouldn't be used with pieces larger than 32"x 40"--and that's pushing the envelope a bit. Second, if you live in an urban environment, try to frame the piece within about a year, because by this time the mat will start to discolor slightly around the edges where polluted air enters between the glass and the mat. By the same token, if you smoke in your house, this is probably not a good option. Third, you must use care when handling large pieces in clips and glass, although I have framed and transported many large clipped pieces and never had any problem. And finally, the edge of the glass will be exposed, which may not be compatible with rambunctious children, and I wouldn't hang a picture in clips and glass over the head of my bed, especially in earthquake country.
Glazing and lighting
A few words about glass: The vast majority of all glazed pictures are glazed with regular picture-framing glass (which is like window glass, but thinner, and you can always use regular single-strength window glass for framing), but there are other options, all of which are more expensive.
There are several kinds of "nonglare" glass. The oldest, cheapest, and most common is a slightly frosted glass. I almost never recommend this. First, it doesn't eliminate glare; it diffuses it. Second, when separated from the art even by the thickness of one mat, it blurs the artwork. And third, it dulls the intensity of dark colors, so black will appear dark grey, etc. On the other hand, I have seen it used very successfully in a situation where otherwise the glare would have been unbearable, and where the artwork was a soft Chinese painting on silk, in which crisp detail and contrast were not important elements.
In addition to this conventional "nonglare" glass, there are now several kinds of optically coated non-reflective glass. These drastically reduce glare, but they are not widely offered and are still very expensive, about five times the price of regular glass.
There is also the UV-protective glass, which is about twice the price of regular glass. The ultraviolet light in sunlight causes fading and other kinds of damage to art papers and media. Regular window or picture glass eliminates 30% to 50% of UV rays (but it delays fading by only about 20%). UV-protective glass (or UV plexiglass) screens out between 95% and 99% of these rays. However, using this glass is not a license to hang most pictures on a sunny wall and forget about them. If some materials in your picture would normally fade in a year in your bright interior location under regular glass, using 95% UV will extend the life to ten years, which is not forever.
There is some glass that is both non-reflective AND UV-protective. Currently, this is priced for museums and millionaires, but you may want it in some circumstances.
Then there is plexiglass. Even if the price doesn't deter you, you shouldn't use plexiglass unless you have a very good reason to do so. Plexiglass will warp on pictures of moderate to large size, and although this only occasionally poses a structural problem, it looks terrible. In addition, plexiglass scratches easily, and cleaning it is troublesome. The main use for plexiglass is for a picture that must be routinely handled or transported, and the owner prefers scratching to breaking. Of course, plexiglass is also lighter than regular glass, but weight shouldn't be a structural problem in framing until the piece exceeds 36"x 48", in which case you will probably have to use plexiglass anyway unless you assume the extra hassle of obtaining a large piece of glass.
When it comes to lighting the framed work in your home, two major considerations are achieving a pleasant outcome while avoiding excessive damage. Remember, an artwork can only reflect the colors landing on it, so daylight permits all colors to show well, while if some parts of the spectrum are missing in the light source, those colors will not show up as well. In addition, most people find light that is missing parts of the blue/violet spectrum annoying and uncomfortable, though they cause the least damage to art.
The following diagram shows the colors spectrums of various light sources. UV light is the part under 400 nm.

Strong light, especially ultraviolet light, and to a lesser extent, the blue/violet part of the visible spectrum, hasten the damage (making dark and brittle) to acidic papers and causes fading of fugitive pigments. Sunlight contains the most UV radiation; fluorescent lights emit less but are still more destructive than incandescent light. So avoid hanging art in fluorescent light or bright sunlight. Flourescent lights change color and emit more UV with age. Halogen lights cause little damage, but they are very hot and have other disadvantages. (Using UV filters slows damage from all light sources except LED, but this is not something people usually do in their homes.) Naturally the intensity of the light is also critical, and this diminishes rapidly with distance, so mounting a picture light close to the picture (as with a light attached to the picture frame) doesn't seem like a very good idea, except on absolutely lightfast artworks. And, of course, daylight can be hundreds of times more intense than artificial light, and is also usually "on" for more hours per day.
Everything is relative. Part of the sales pitch for LED lighting is that LED lighting does not contain UV, so it doesn't fade art. This is misleading. LED lights are manufactured in a few different ways; fortunately, the ones that render colors the best (the best "quality") also happen to be the ones that cause the least fading. But the majority of LED bulbs on the market are not good quality and most of the cheaper (household) ones can be as damaging as incandescent or fluorescent lights. "If one only selects LED lamps that have good-quality or excellent-quality light [CRT or CIE around 90 or higher], then damage is not a concern, but if one accepts any LED lamp offered, then both the appearance of the objects and their preservation are at risk. To place the damage from even the worst violet LED in perspective, however, it is no more than, and sometimes less than, the damage by daylight." For technical information, see https://www.canada.ca/en/conservation-institute/services/conservation-preservation-publications/technical-bulletins/led-lighting-museums.html .
Bottom line: Old incandescents are the least damaging kind of light. Don't put works on paper in the sun or under flourescent lights (oil paintings, mosaics, etc. are okay there). If there are any fugitive materials in the work, and you want the work to last as long as possible, use UV-glass.
Mouldings
There are also some practical considerations in the moulding choice. Of course, your framer will let you know which frames are structurally able to support your work, and will provide any necessary reinforcing. Professional fitting charges are usually lower for metal frames than for wood frames. For the do-it-yourselfer, metal frames are much easier than wood ones to disassemble and reassemble if you have to fix something; all it takes is a big table and a screwdriver. Most people do not have the right equipment to refit wood frames at home. Metal is also a good choice if you know you will be moving soon or have to ship the framed art, since you can fairly easily slip the glass out, or insert protective cardboard around the glass, and reassemble the package for safer shipping.
In addition, a framed artwork is meant to be hung on a wall and left there. So if your frame is going to get any unusual wear and tear, choose a durable moulding, either wood or metal. If you are going to be transporting the piece much, or if it is likely to be in the line of fire of children, etc., avoid painted metal frames, which scratch easily and irreparably. (A better option is one of the colored anodized metal finishes, which are much more durable; but although these finishes may be quite hard to scratch, once scratched, the scratch is hard to hide.) Metal frames also cushion the glass less than wood ones, which means sharp blows to the side of a metal frame are more likely to result in broken glass. On the other hand, occasionally you can replace a single scarred leg of a metal frame. You can also repaint a metal frame with spray paint. If you choose a wood frame, use a hardwood frame in a finish that will hide dents and will be easy to touch up if the finish is marred. The other major weakness of a wood frame in terms of withstanding constant handling is its stretched backing paper, which punctures easily, but that is not a serious matter because it is easily patched or replaced.
Copyright 2000-2022
Updated 2025